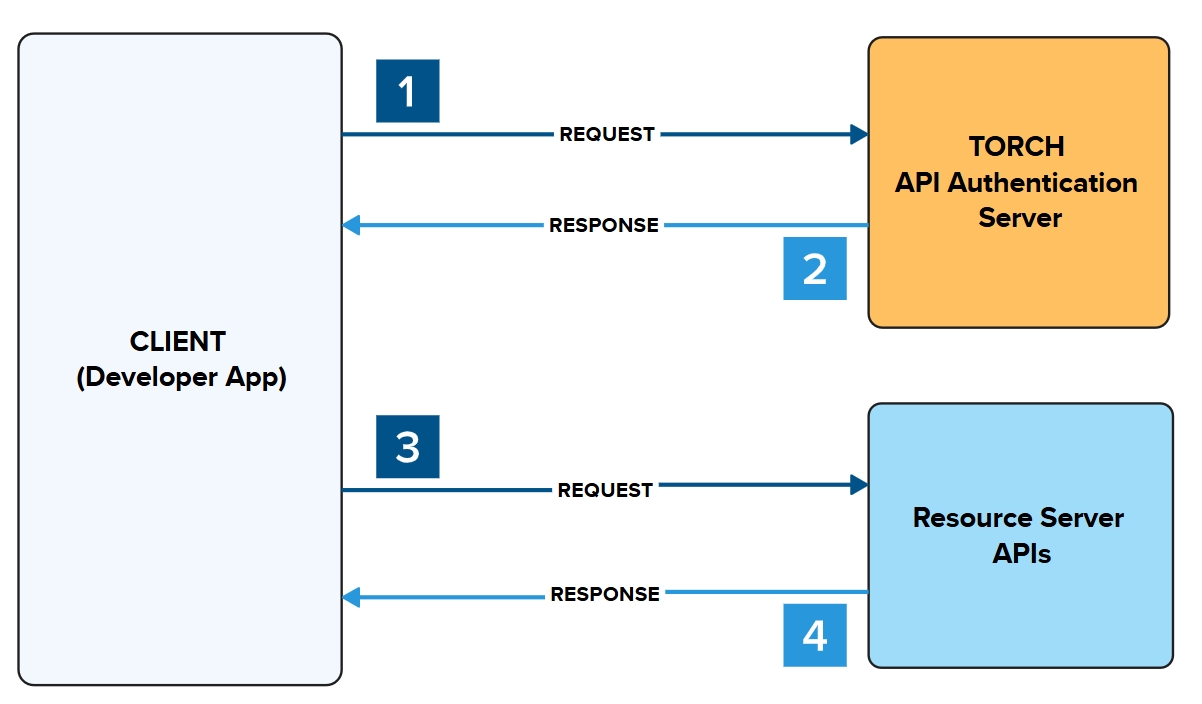
Using the Torch API Sandbox is your first step towards developing with USCIS API’s. All USCIS API’s are secured using OAuth 2.0 client Credentials.

- Make a request to authenticate using your Client ID and Client Secret
- A response is returned providing an Access Token
- Place the Access Token in the header to make a request to authenticate request to the Resource Server API
- A response is returned from the Resource Server API with the requested data
Initializing this handshake can be performed on the Developer Portal, or externally with developer tools.
- Internally: On the Developer Portal > API Documentation > Authorize/Try It Functionality
- Access Token handshake is executed on Developer Portal and stored

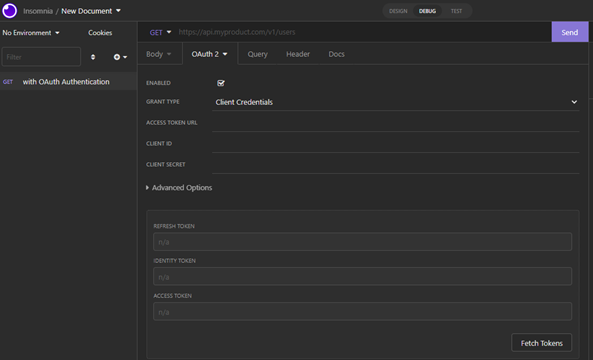
- Externally: Use of Developer Tools (ie Postman, Insomnia, etc)
- Access Token handshake is executed outside of the Developer Portal and stored externally

The Access Token URL can be found below, for Sandbox or Production environments.
Sandbox Environment:
https://api-int.uscis.gov/oauth/accesstoken
Production Environment:
- Available upon passing demo
Authenticating your Sandbox, using the Try It/Authorize Function
Step 1: Create your App with Access to API(s)
To begin development in the Sandbox, you should have already reviewed and completed the Create an App process to:
- Obtain your Consumer Key (or ClientID) and Consumer Secret
- Enabled your APP for the API, you wish to Authorize on Sandbox
- Click on Apps > Click on the App Name > Click on Edit > Under API’s a Check indicates the App is Enabled to the API
- Failure to Enable the API, will result in Sandbox Authentication Errors

Step 2: Locate the API you want to Test in Sandbox
Now that your App is created & enabled to the API – click on the API Menu and located the API you would like to test in Sandbox.

You are presented with the API Specifications for this API including:

- API Overview: Summary of the API
- Description of the API and its Functionality
- Definition of the Resource Types
- URIs relative to the API Specs
- Definition of Resources and Parameter definitions
- API Reference: Sample responses of the available Methods on the endpoint
- HTTPS Request URLS
- Query Parameters
- Sample Responses
- Authorize and Make API Calls
- Within the API References, you can “Authorize” the Developer Portal to execute API Calls to the HTTPS Request URL selected.
Step 3: Authorizing your App to the Sandbox API Spec
Now that we have confirmed your App is created and enabled to this API, we are ready to retrieved an Access Token to make API calls.
First, we will need to copy the Consumer Key and Consumer Secret from your App in Step 1 to your Clipboard. We suggest accessing this in a new tab or window.

*From App > Click on App Name > View
Picking up where we left off in Step 2, Click on the Authorize Button, and inout:
- Consumer Key in ClientID
- Consumer Secret in Client Secret
- Click on Authorize

If the Consumer Key and Consumer Secret pair are authenticated correctly, you will see an Access Token Acquired message. Click on OK.

Step 4: Using the Try It – Sandbox Function
Now that you are successfully authenticated with Sandbox Access Token, you can begin your API test. Before you make an API call you should
- Identify which HTTP Request URL you want to hit
- Research the API Resources including your Request Body and Query Parameters
Once you know the function and API call you wish to make, scroll down to the Try this API section, and input your request body parameters and click Execute.

The API Response will provide an XML/JSON output of the data payload indicating a Sandbox API Call was successful.
If you run into any issues, please send us a screenshot to [email protected] and provide the following.
- Name of the API and HTTPS Request URL
- Copy of your Request Body
- Screenshot of your error

