
Using the Torch API Sandbox is your first step towards developing with USCIS API’s. All USCIS API’s are secured using OAuth 2.0 client Credentials.
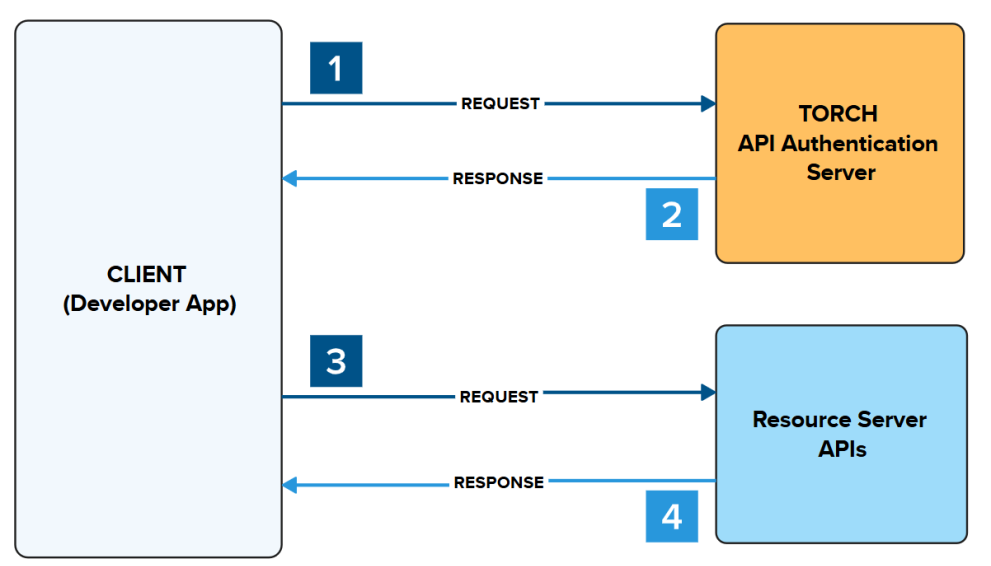
- Make a request to authenticate your app.
- A response is returned providing an Access Token
- Place the Access Token in the header to make a request to authenticate request to the Resource Server API
- A response is returned from the Resource Server API with the requested data
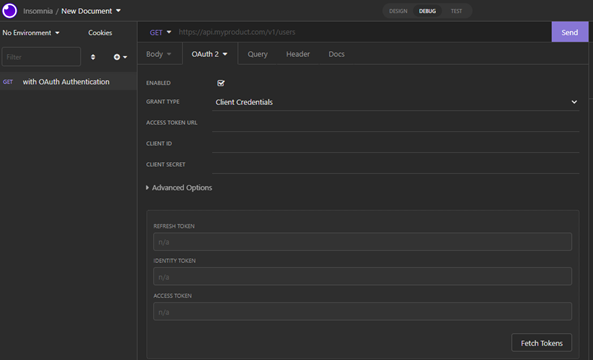
Initializing this handshake can be performed on the Developer Portal, or externally with developer tools.
- Internally: On the Developer Portal > API Documentation > Authorize/Try It Functionality
- Access Token handshake is executed on Developer Portal and stored

- Externally: Use of Developer Tools (ie Postman, Insomnia, etc)
- Access Token handshake is executed outside of the Developer Portal and stored externally
The Access Token URL can be found below, for Sandbox or Production environments.
Sandbox Environment:
Production Environment:
- Available when you pass your demo.
Authenticating your Sandbox, using the Authorize/Try It Out Feature
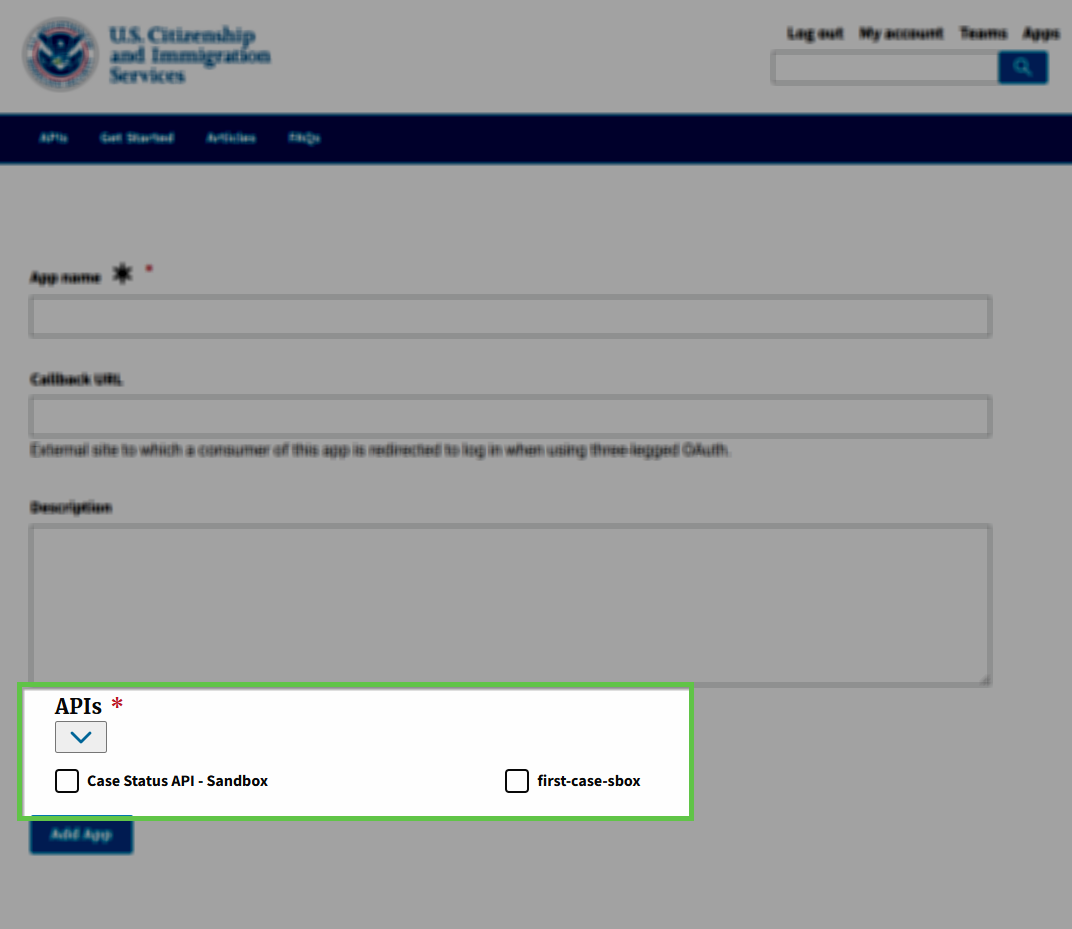
Step 1: Create your App with Access to API(s)
To begin development in the Sandbox, you should have already reviewed and completed the Create an App process to:
- Obtain your ClientID and Client Secret
- Enabled your APP for the API, you wish to Authorize on Sandbox
- Click on Apps > Click on the App Name > Click on Edit > Under API’s a Check indicates the App is Enabled to the API
- Failure to Enable the API, will result in Sandbox Authentication Errors
Once you have created your App, locate your Client ID and Client Secret. Copy to your clipboard for use in a later step.
Step 2: Locate the API you want to Test in Sandbox
Now that your App is created & enabled to the API – click on the API Menu and locate the API you would like to test in Sandbox and click on View Documentation.

Step 3: Using the Authorize/Try It Tool
Now that we have confirmed your App is created and enabled to this API, we are ready to retrieved an Access Token to make API calls.
First, confirm you have your Client ID and Client Secret handy from the previous step.
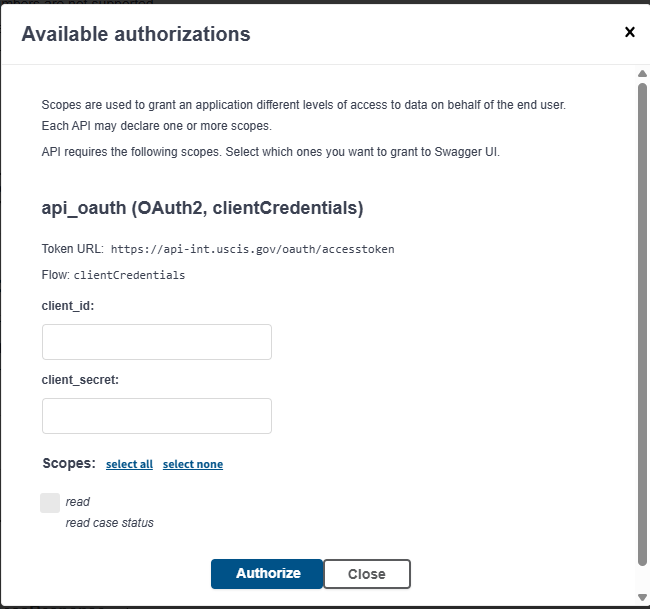
Then, from the API Documentation screen locate the Authorize button to trigger the modal screen.
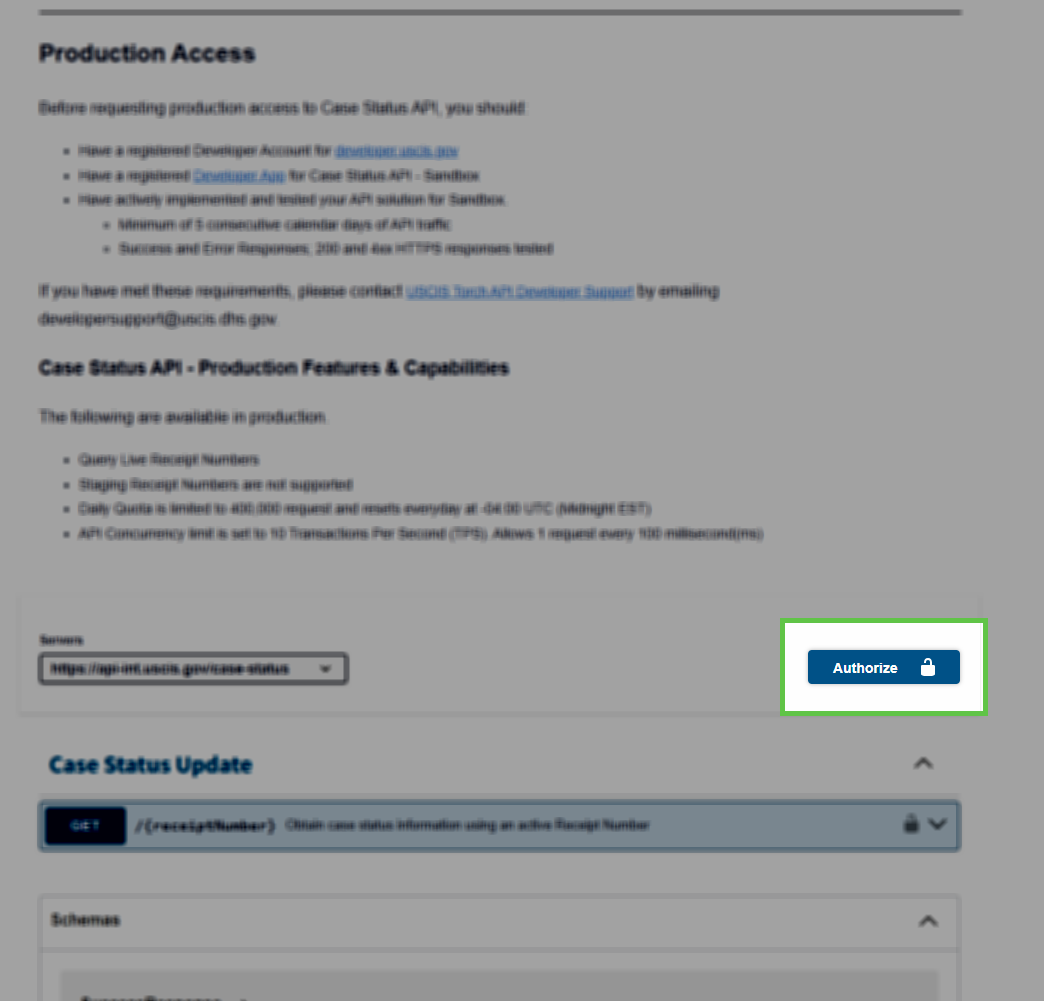
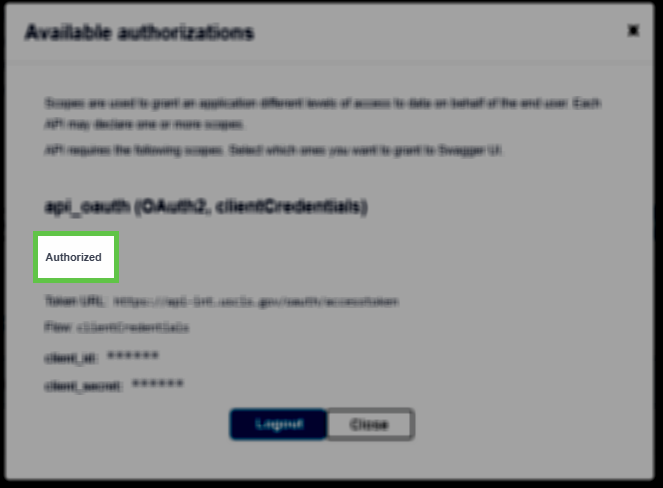
Enter your Client ID and Client Secret into their respective fields and click on Authorize and wait for an Authorized confirmation appears on the screen before closing the modal window.
Once you are authorized, navigate to any of the API resources and click on Try It Out.
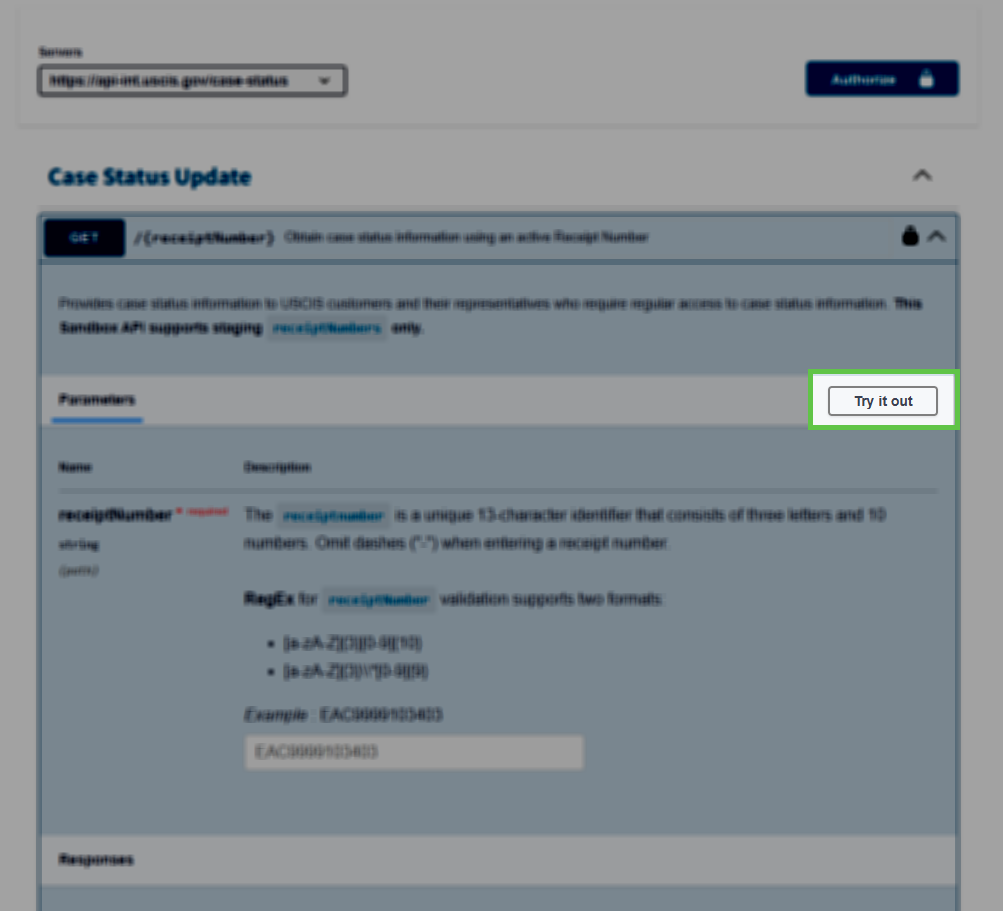
Follow the prompts to test the APIs.

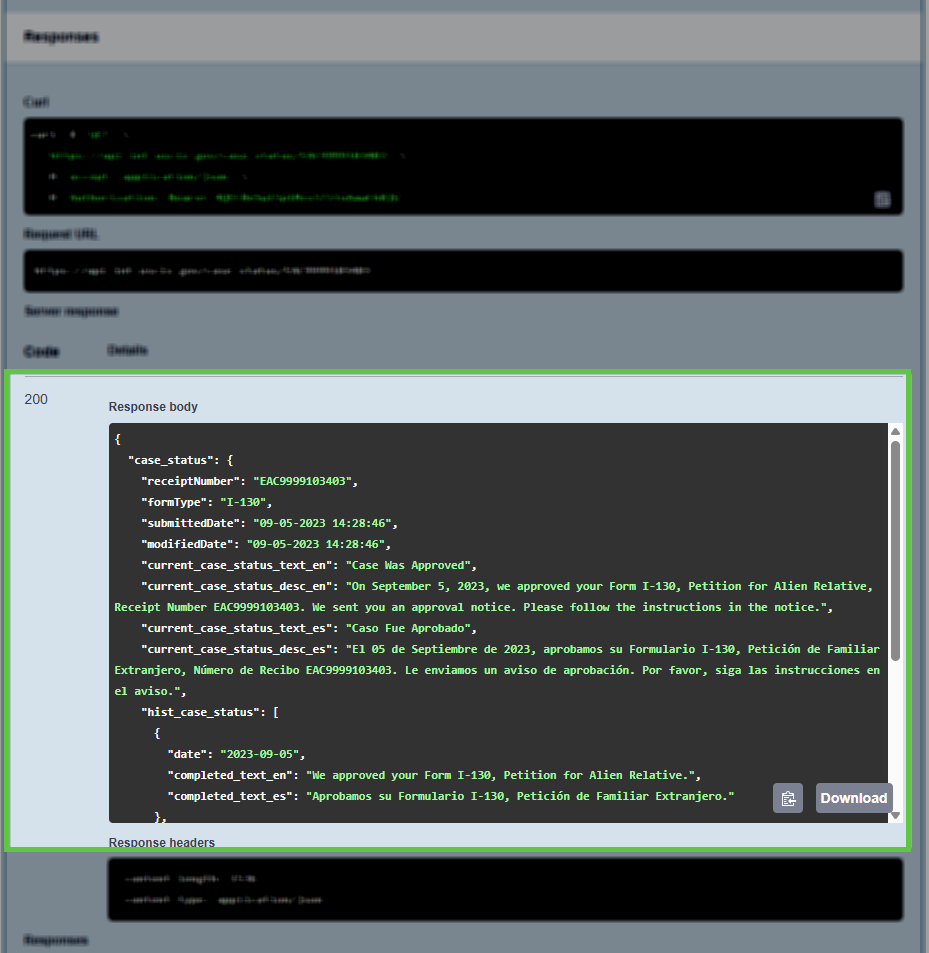
If successful, the 200 OK Response will return on the screen with the updated JSON Payload from the API.
If you run into any issues, please send us a screenshot to [email protected] and provide the following.